Address
304 North Cardinal St.
Dorchester Center, MA 02124
Work Hours
Monday to Friday: 7AM - 7PM
Weekend: 10AM - 5PM
Address
304 North Cardinal St.
Dorchester Center, MA 02124
Work Hours
Monday to Friday: 7AM - 7PM
Weekend: 10AM - 5PM

Miniconda is a tool used for managing packages in Data Science and similar areas. It’s like a simpler version of Anaconda but without the extra stuff. Anaconda has lots of packages already installed and is easy to use because of its friendly look, kind of like ready to go from the start.
Miniconda, though, starts off empty without any packages. This means you can pick exactly what you want to add, making it perfect for people who know exactly what they need. It lets you set up different environments for different projects, giving you a lot of control and flexibility.
A big plus of Miniconda is that it doesn’t use up a lot of your computer’s resources. It works through the command prompt, which might seem a bit basic but actually lets you do everything you need without wasting space or power. This makes it a great choice for data science work because it’s efficient and you can tailor it to your specific needs. Smart Coders Prefer Miniconda Over Conda for its Efficiency and Flexibility.
To download miniconda click on this link. The installation process is really simple. Just double-click the .exe file. Follow the instructions on the screen. If you are unsure about any setting, accept the defaults. You can change them later.
Open the Anaconda prompt miniconda app from the start menu. Right click and open the miniconda as an administrator.
As you will initialize the app , following screen will show up. By default the miniconda is installed in the directory c:\users\user_name and the base is the default environment name of the miniconda. My user name is ak.
In Miniconda, you can set up different environments, sort of like having multiple rooms in a house. In each room (or environment), you can have exactly what you need for a specific task, like different software, programming languages, and libraries. Think of Miniconda as your house, and each environment is a room designed for a specific purpose. Just like how you wouldn’t put a bed in the kitchen or a Frying Pan in the bedroom, you organize each Miniconda environment with only the tools you need for its particular job.
For example, Miniconda is the house, and each environment is a room. You fill each room with things (like packages and software) that suit only its needs. This way, everything stays organized and ready to use whenever you need it, without any mix-ups. Miniconda comes with one default environment called base, which you cannot delete.
We can check the list of all the environment in miniconda using following command
conda env list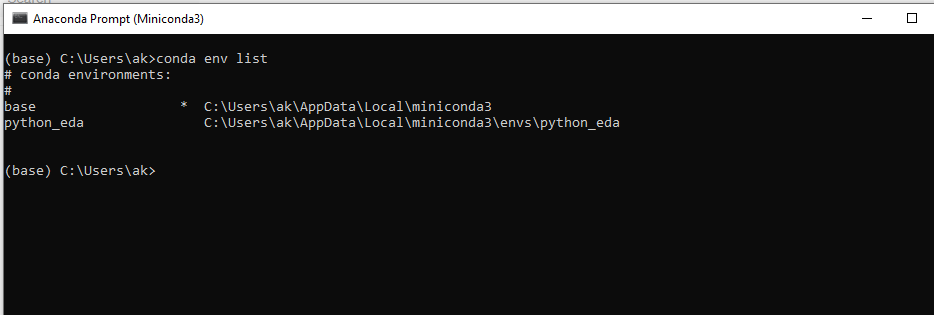
the asterisk sign * indicates the current active environment. Currently we have 2 environment in the miniconda.
In order to check what software’s, packages and other supporting apps are installed in an active environment we can use the following command
conda listLet’s create a new environment in the miniconda and we will call it env_01.
conda create -n env_01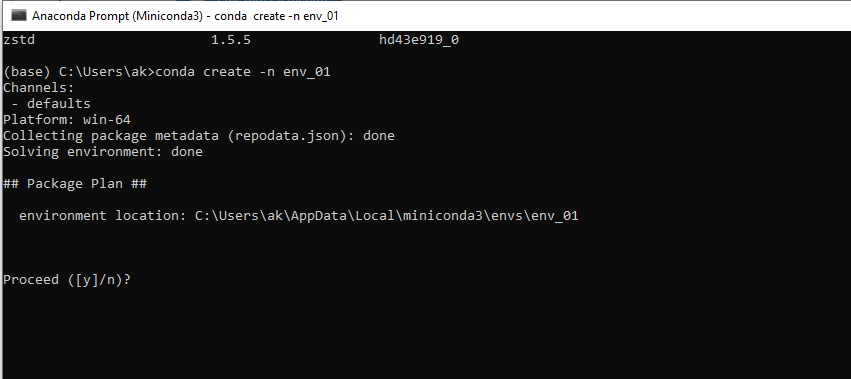
Press y and it will create the new environment with the name of env_01. We can check the new environment by following code.
conda env list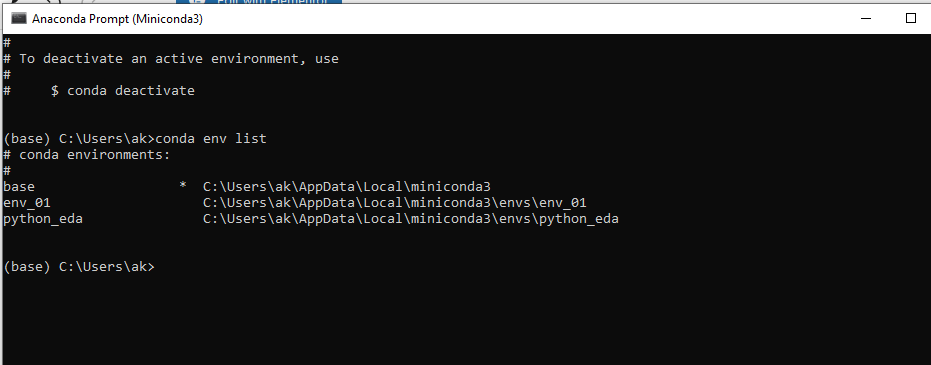
We can now activate the new environment which we have created.
conda activate env_01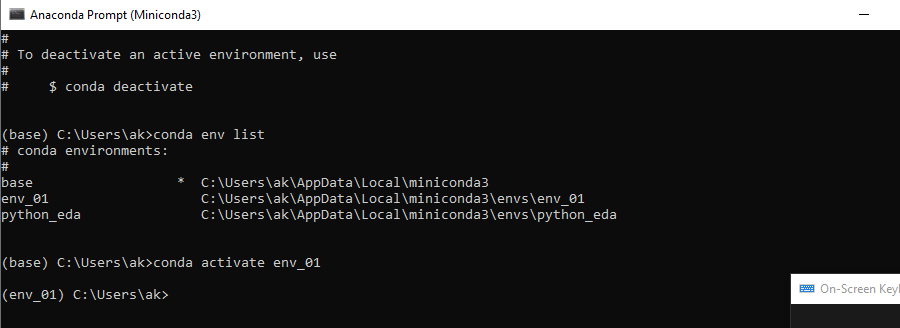
Now take a look on the list of item which are pre-installed in the new environment.
conda list
As it is newly created environment it is showing no packages install in it. I can show you different packages installed on another environment. In order to activate another environment I used following command.
conda activate python_eda
Now take a look on the list of item which are installed in this environment.
conda list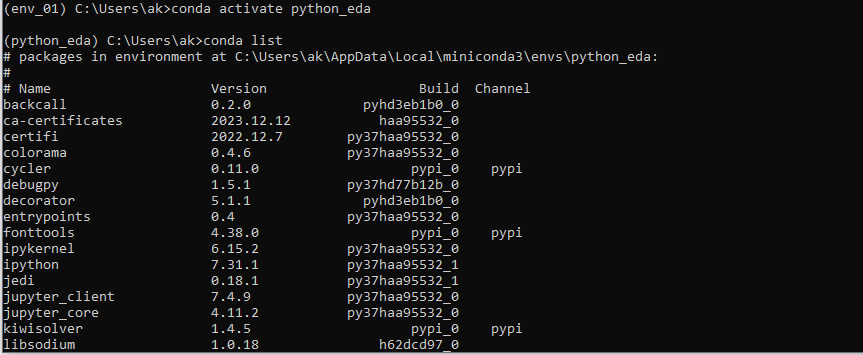
Once the environment is activated, we can launch VSCode in the current directory by using following code. This command opens VSCode in the current directory (. signifies the current directory).
code .We can also create a new environment and add packages to it in a single command line as well. In the following code we are creating a new environment name env2 along with a package of python.
conda create -n env2 pythonWe can also install two and more then two packages at once in a single command line. Let’s install library pandas matplotlib seabornand numpy into our active environment i.e. env2.
conda install numpy pandas matplotlib seabornTo utilize Jupyter Notebook, it’s essential to install ipykernel within the environment.
pip install ipykernelIn order to check the version of miniconda we use the following command.
conda --versionYou can also verify by using the “conda search conda” command to see a list of all available versions and the most recently updated one. This method applies not only to Python but also to other libraries. For instance, to view all released packages of the “pandas” library, you would run the following command.
conda search pandasOne of the reasons for creating different environments in Miniconda is to run various packages or libraries together by adjusting their versions. To understand this better, consider this scenario: Python releases its new version, 3.12, and you’ve updated to it. However, other packages like pandas and numpy aren’t yet compatible with this new version. It might take a week or two for them to upgrade and become compatible with Python 3.12. In such cases, environments allow you to downgrade or choose the specific version you need. In this case you can install the older version of python. Using following command you can install python 3.11.5
conda install python 3.11.5You can duplicate an existing environment, including all its installed packages, with a new name. Here, we’ll make a copy of the existing environment “env2” into a new environment named “env3.”
conda create --clone env2 -n env3Occasionally, conflicts can occur because of compatibility discrepancies between updated and older packages. Updated packages might not function smoothly with older ones, and vice versa. To simplify and update all the packages in the environment simultaneously, while also determining compatible versions, we can use the “conda update –all” command. This ensures that all packages are adjusted and compatible versions are installed for smooth operation.
conda update --allSometimes, you may need to remove a specific environment, package, or library from Miniconda to free up space or for other reasons. This can be easily accomplished.
conda env remove -n env2conda remove pandasExporting an environment is a smart practice. The idea behind creating an environment file is to have a backup stored on your computer, cloud, or any preferred source. If Miniconda or your working machine crashes, you can import the environment file to restore it. All the package settings remain intact. In Miniconda, the file extension used is .yml.
Note: In the saved file, the environment name will be “env2”. Therefore, when importing it back, there should be no existing “env2” in Miniconda.
Assuming we are working in “env2” and want to export the file, we run the following command, and the file is saved by default in “C:\users\ak>”.
conda env export > name_of_file.ymlAfter successfully exporting the file and saving it as “env2.yml,” before importing it back, we must ensure that no environment named “env2” is present in Miniconda. Once confirmed, we can run the following command.
conda env create -f env2.ymlWhen you save a file of an environment after exporting. The file name can be of your choice. But remember the name of the environment will be the same.
For example. Your environment name is abc you export the file and name the file xyz The file will be save as xyz.yml . When you import the file back in miniconda the environment name will be abc.
A requirements file is a plain text document that stores all the packages and modules you are using in your environment and overall project. It’s considered good practice to keep this file and also upload it to your GitHub repository.
conda list --export > requiremnt.txtNow to import a `requirement file, we can run the following command.
conda install --yes --file requiremnt.txtHere are some useful resources for further reference: